UrduFonts.com is the largest online repository, which provides high-quality Urdu fonts. Each font in our collection is a carefully selected, tested and made available for free.
UrduFonts.com is the largest online repository, which provides high-quality Urdu fonts. Each font in our collection is a carefully selected, tested and made available for free.
Urdu is the most used language in the region of South Asia. To present this beautiful language digitally, we have thousands of fonts and typeface families that display Urdu script elegantly across various typing platforms. You will find many software for writing in Urdu like Microsoft Word. MS Word is a powerful tool for writing documents. Furthermore, Microsoft word not just allow you to write in English but in other languages as well. And the key to do this is using that certain language compatible fonts.
You can write in Urdu in this software using the Urdu fonts which offer the right styling and script for your content, increasing its readability and making it more visually attractive. No matter whether you are writing essays, reports, or any other document in MS word, the right font can make a prominent difference. Below, we will discuss the procedure of installing and configuring Urdu fonts in Microsoft Word, guaranteeing that you have the required tools to write Urdu content seamlessly. Read more about How to Install Urdu Fonts on Android Mobiles with our guidance.
Downloading Urdu fonts is quite an easy and simple process which you can follow without any hassle. To download Urdu fonts in MS word, there are 2 options available for you.
Those who are using a current version of MS Word, they might have access to some of the amazing built-in Urdu fonts. For this, you can simply check if your recent MS version has these fonts. If yes, then simply enable those fonts within the software.
Individuals who need particular Urdu fonts that are not available in their MS Word version, they can simply search for them on popular online font websites. These sites provide a diverse range of Urdu fonts along with Urdu options. Download the specific font files in your device.
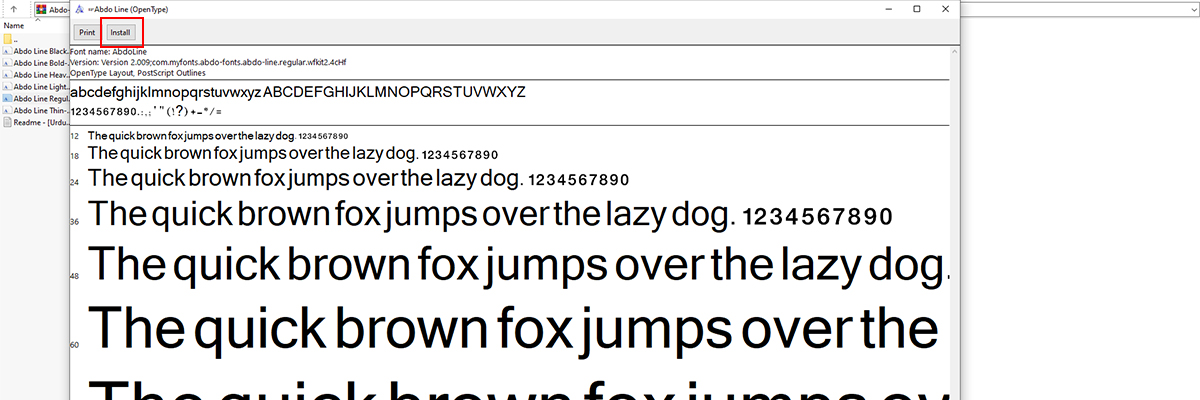
After you have downloaded the required Urdu font files in your computer or laptop, installing them is a quite a simple process. The step-by-step instruction to install Urdu fonts are as follows:
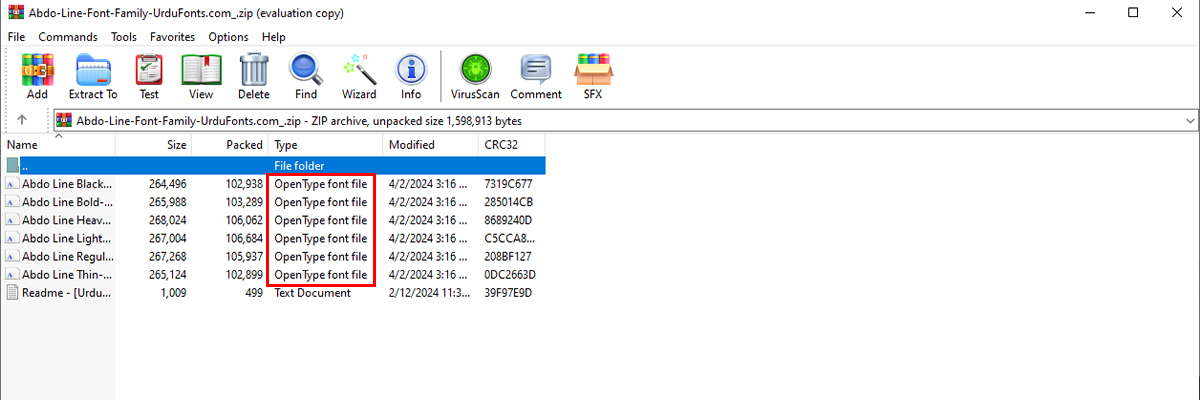
First, locate the downloaded fonts in the file explorer. They'll probably be in a zip file, open it and extract the fonts on your desired location.
For installing the fonts, you have again two choices. We can achieve our desired goal either way. However, the first stated method is more efficient. Nevertheless, let's have a look at each.
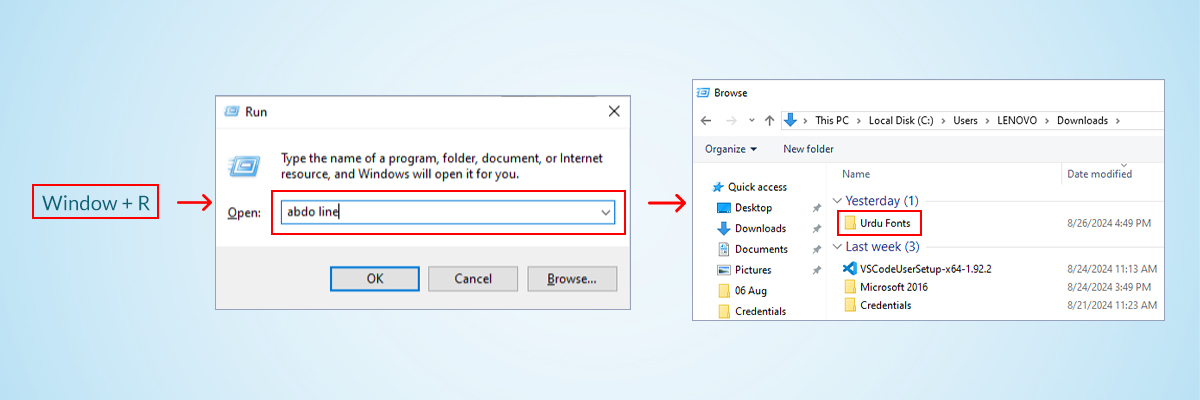
After using any one of the methods we have discussed above, the Urdu fonts are successfully installed on your computer. You can simply use these in software such as MS Word. Also, learn more How to Install Urdu Fonts on PixelLab mobile application?
The fonts have been downloaded and installed, now we have to configure them in MS in order to use them. To set up the installed Urdu fonts, here is a complete step-by-step guide for you. Moreover, get an insight on some of the best Nastaleeq Urdu Fonts to be used on Word.

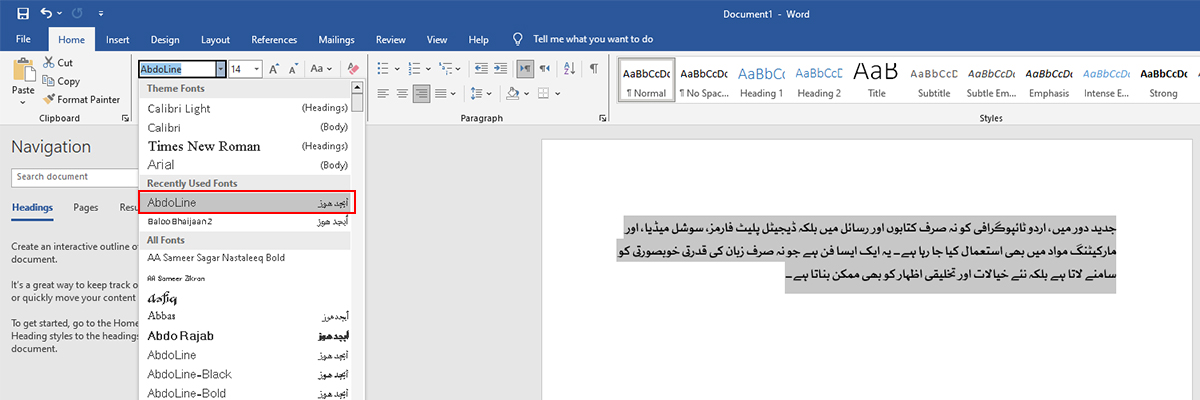
Installing and configuring Urdu fonts in Microsoft Word is an easy and simple procedure that allows you to enhance your content creation journey. Not just it will allow you to create your documents in Urdu but will also transform it from ordinary to extra-ordinary, making it visually aesthetic. By installing and using the right Urdu fonts, you can create the best formatted Urdu documents that leave a long-lasting impression on the readers. In this guide, everything is discussed in detail to make the installation and configuration process easy for you.

Dedicated Urdu Fonts contributor sharing expertise in typography, font installation, design assets, and language technology trends.
Compatible with most of the software which are of mobile, desktop and websites.
