UrduFonts.com is the largest online repository, which provides high-quality Urdu fonts. Each font in our collection is a carefully selected, tested and made available for free.
UrduFonts.com is the largest online repository, which provides high-quality Urdu fonts. Each font in our collection is a carefully selected, tested and made available for free.
Adobe Photoshop is a popular raster graphics editor for Windows and macOS, created in 1987 by Thomas and John Knoll. It is widely used for professional digital art and editing. As its name suggests, it was primarily launched for image processing and editing; however, today, it has a much broader take on the graphic design industry. From adding filters to your images and tweaking them to enhance their quality and features, Photoshop allows you to create creative projects from scratch. Just install the related plugin according to your requirements and let your imagination flow.
Photoshop is a comprehensive program that allows designers to compose brilliant images using English fonts and facilities. However, when it comes to Urdu, the software’s a bit shy. It does not support Urdu as a built-in language like others, therefore posing a challenge to its usability in our creative projects that need a flair of tradition and heritage. So, to cater to this problem, here we provide you with a comprehensive step-by-step guide to use and compose creative material using different Urdu fonts and styles in Adobe Photoshop. This guide will help you explore various techniques along with the process of achieving your goals.
Urdu is the national language of Pakistan and is widely used for communication. INPage is a popular 3rd Party software in Pakistan for writing in Urdu. People export their Urdu text from INPage and use Coral Draw or Adobe Photoshop to create graphic text. Adobe Photoshop is a graphic designing software used for creating logos, images, and brochures. It does not primarily support Middle Eastern and South Asian languages, including Urdu; however, with time, Adobe couldn’t neglect its need. Later, it enabled its users to install an Urdu keyboard in the software itself, so they didn’t have to rely on outside tools. This article guides users on how to write Urdu in Photoshop without relying on any 3rd Party writing tool.
You may also like: Understanding the Primary Categories of Urdu Fonts
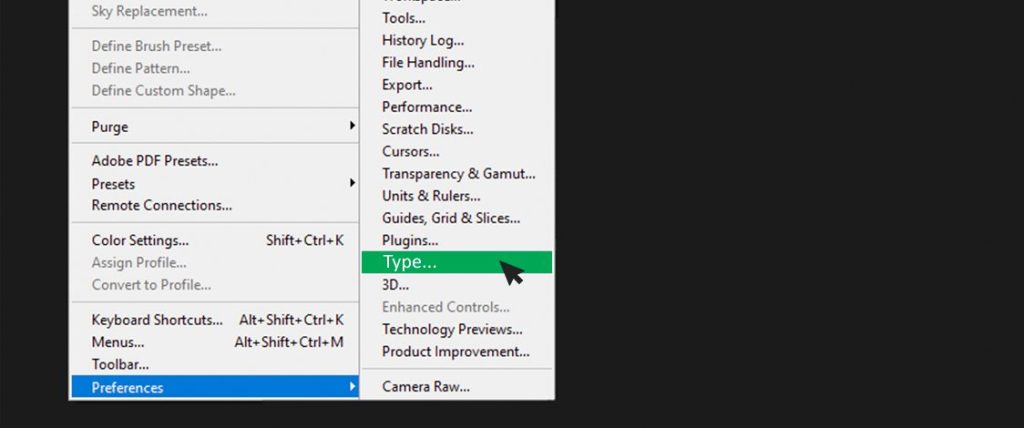
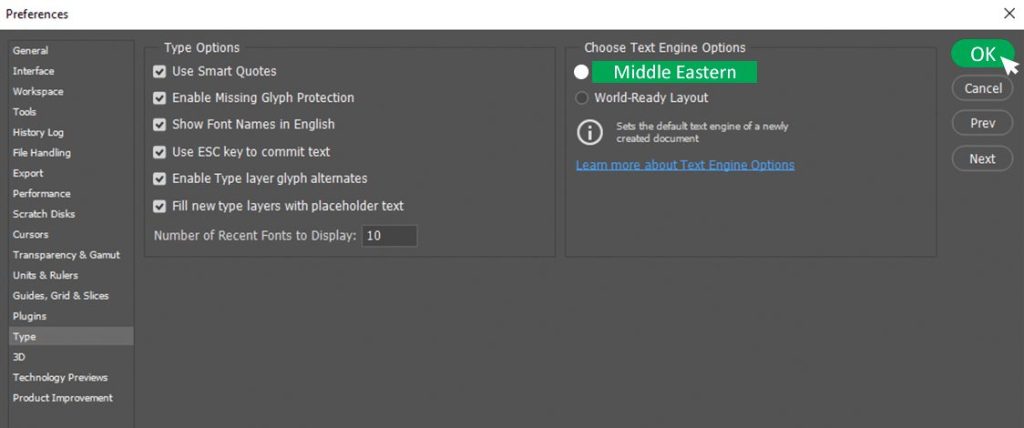
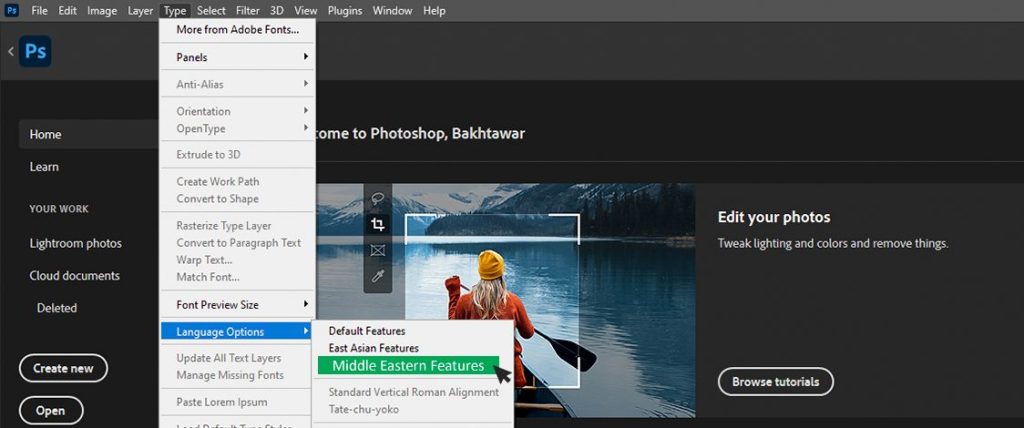
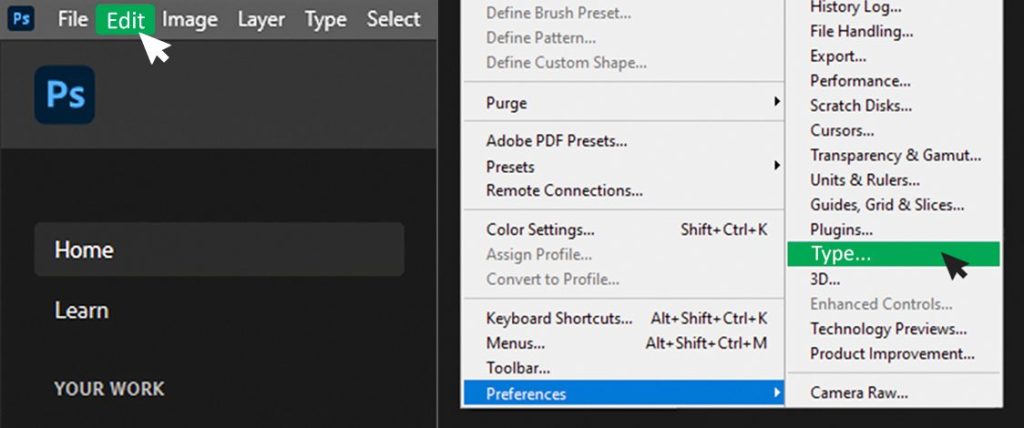
To write Urdu in Photoshop on a given OS, you’ll first need to install the Urdu language pack. Here’s how to do it:
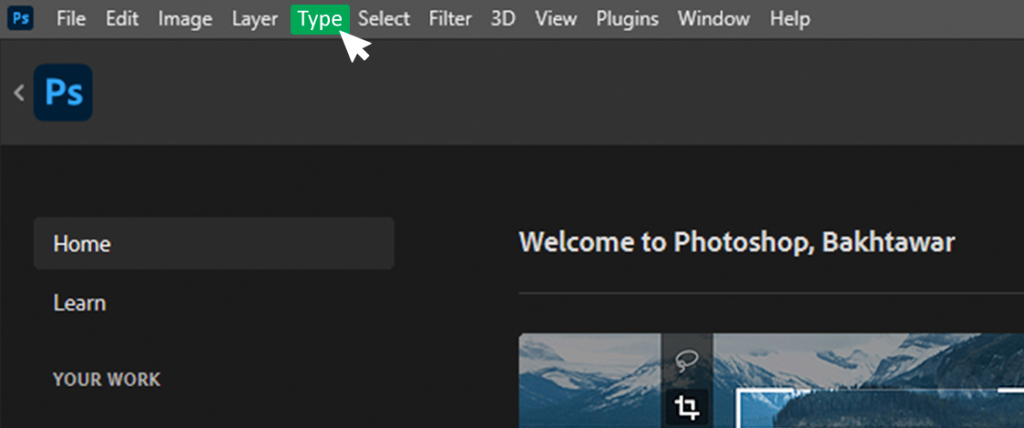
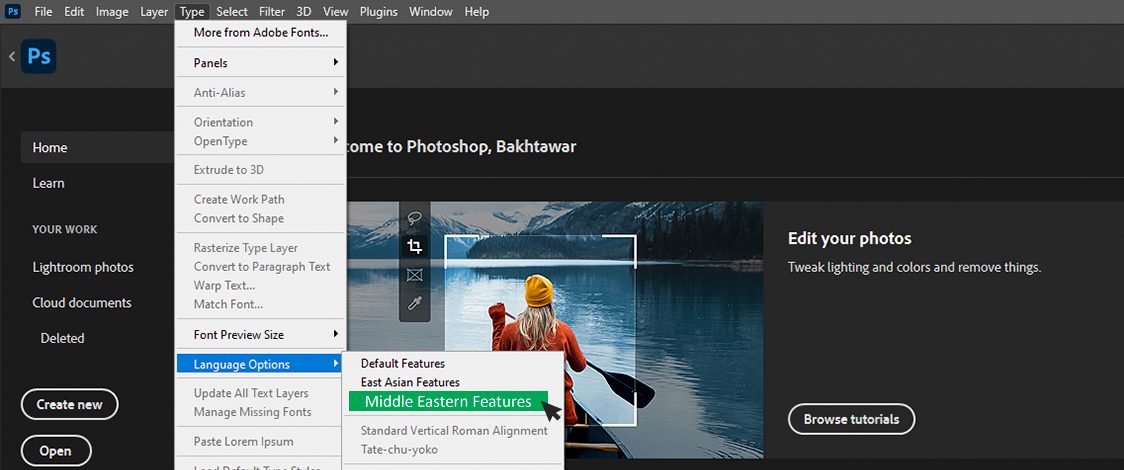
We have learned above how to download and install the keyboard in your software. However, to write Urdu in Photoshop on Windows 10, follow these steps:
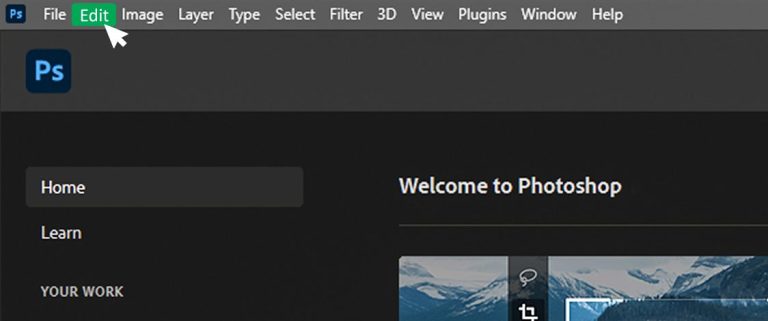
Here are a few tips to further optimize you’re your text and enhance its display features:
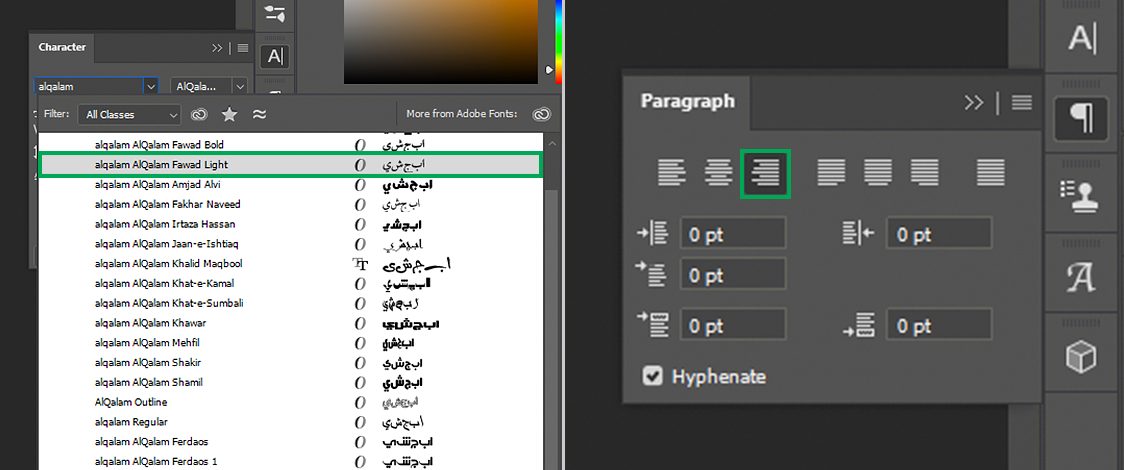
Once you have your Urdu text in Photoshop, access the “Character” panel (Window > Character). This panel allows you to fine-tune the appearance of individual characters, including:
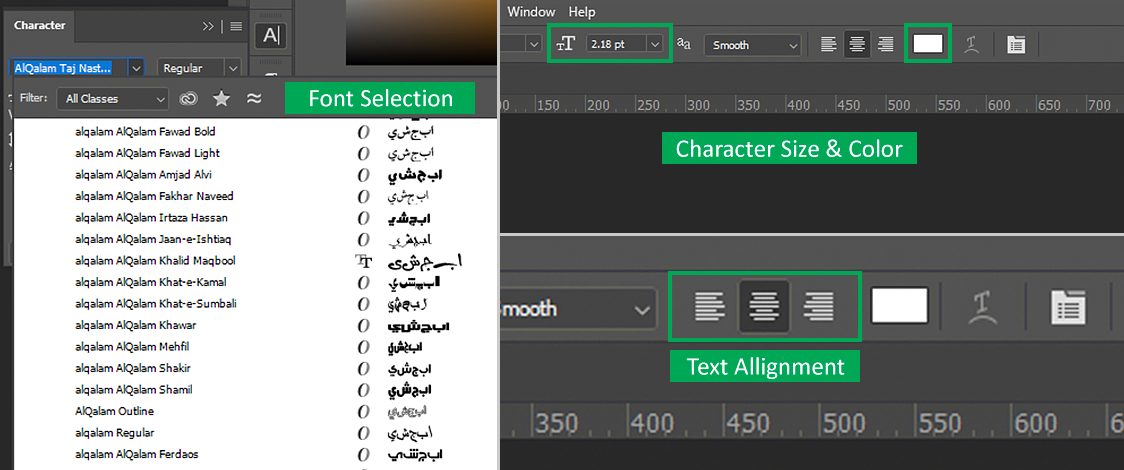
Always go for vector-based fonts to maintain text quality, especially when resizing or scaling up your Urdu text.
Experiment with various Urdu fonts and styles to discover the one that best complements your design look and feel.
Save your Photoshop document in formats like PSD to retain text layer editability for future adjustments.
Urdu text direction means arranging Urdu script in a document or design so that it flows from right to left, which is the standard reading direction for the Urdu language.
The Kasheeda option in Photoshop allows users to elongate specific characters in Arabic or Urdu text to improve spacing and readability. This enhances the overall appearance of the text.

Photoshop is a great tool for professionals and amateurs likewise, to achieve the artistic impression they desire. While directly typing Urdu within Photoshop might not be readily available, the above-mentioned method and tips will help you overcome that issue. With that, now you can create your artistic projects effortlessly in whichever format and language you want, breaking the linguistic barrier and letting your creative instincts go wild.
No comments yet
Compatible with most of the software which are of mobile, desktop and websites.